How To Take The Best Photos For Your Brand
Good photography is essential for a brand's online presence. Photos will draw people into your content, and they're also the first impressions of your company that consumers see. To make sure you always have great photos to share with the world, follow these simple tips for taking excellent shots.
In this blog, you'll learn four vital photo-taking fundamentals that will help ensure your photos are the best they can be:
- How to take landscape photos
- How to take portrait photos
- Photo sizing guidelines
- Rule of Thirds
Portrait Photo Taking Best Practices
Taking great portrait photos involves much more than “point and shoot.” You’ll need to frame up your subject so that you capture their entire face.
Be sure that they are well-illuminated; aim to have the light source falling on their face, and don’t shoot them with backlighting. That means you'll need to be mindful of the natural light in your environment. It also helps to think about whether or not your photo needs additional lighting; there are many cases where adding some artificial light to brighten up a room can make a huge difference!
Check that you are shooting from a good angle: being at eye-level or slightly above is ideal. Avoid shooting from below, as that can cause the subject's face to appear stretched or shadowed.
Different Portrait Shots To Take
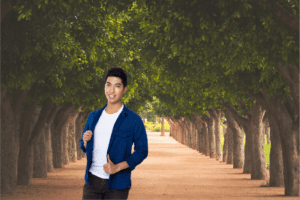
Vary up the angles and positions in your portrait shots, as some will capture your subject's "good side" better than others. You'll want some straight-on shots, shots with the subject's head tilted toward one side, and a few in which your subject is looking at the camera or off to the side. It would be best to also aim for a mix of closeup shots, head-and-shoulders shots, upper body shots, and full-body shots.
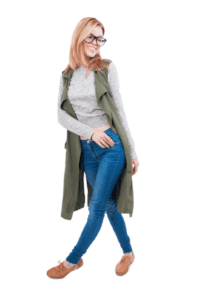


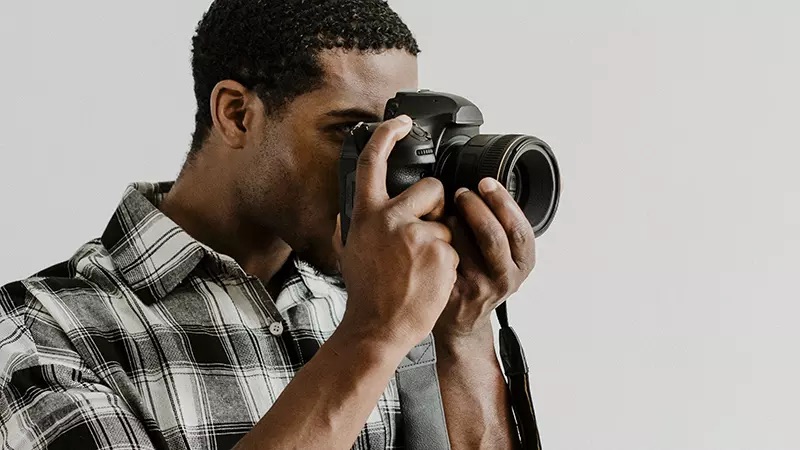
These images are good examples of what a perfect picture should look like, taken head-on with the subject looking at the camera - not too far away and not too close up. The use of light in this shot highlights all aspects of the person's face very nicely. This photograph would be appropriate for use on social media platforms or print out and hang on your office wall!
Take as many pictures as possible! With digital photography, there's no need to worry about wasting film so take lots of different poses, expressions, etc., before finding ones that work well.
How To Position Your Camera for Portrait Photos
While you can adjust your camera’s zoom, it’s best to hold your camera correctly from the start. Follow these tips for optimal positioning.
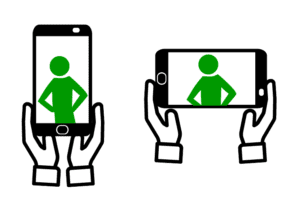
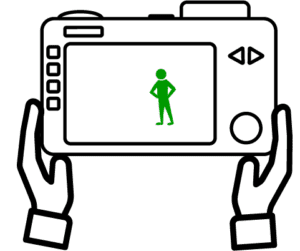
For Phones & Tablets
Hold your device upright and make your subject's face the center of the photo. If applicable, activate portrait mode and tap the screen where your subject's face appears to focus on it. Portraits look best when you are at eye level with your subject. You may shoot from slightly above — never below. Be sure to keep plenty of space around your subject's face to take care not to cut off the top of their head.
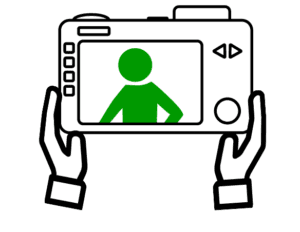
For Cameras
Stand about 6-8 feet away from your subject. Please make sure you fully capture their face when using your camera's zoom feature in the viewfinder. If your camera has auto-focus, be sure that your subject's face is the focal point. Ensure that no parts get cut off by maintaining good space around their face. Try holding the camera both vertically and horizontally for a bit of variety.
Landscape Photo Taking Best Practices
When shooting in landscape, it’s essential to keep your subject the focal point of the photos. As with portrait photos, avoid shooting against the light: you want your subject illuminated so you can see them within their surroundings. Framing is necessary as well. You want to capture enough information to give your subject context, but not so much that your picture looks cluttered. Maintain lots of white space around your subject.
Different Landscape Shots To Take
Try different compositions with varying amounts of scenery or background. Get some relatively close shots of your subject (with plenty of white space around them), as well as some wide shots that show more of their surroundings. Play with the overall framing, but be sure to either center your subject or use the rule of thirds (which we'll cover later in this guide).

How To Position Your Camera for Landscape Photos
Landscape photos are more manageable to crop than portrait photos, but you still want to compose them before you shoot. In other words, don’t rely on post-production to fix your image. Hold your device correctly so that you can get the framing and white space that looks best.
For Phones & Tablets
Hold your device horizontally. To ensure proper whitespace, maintain enough distance around your subject. To focus your camera, tap the subject's face on your screen. Play a bit with distance and framing for a variety of shots.

For Cameras
Cameras are ready to shoot in landscape by default. Begin by aiming the camera at your subject. Position them in the viewfinder and zoom in or out as necessary. If your camera has auto-focus, be sure your subject's focal point is not something in the background.
How To Crop Photos Using Pixlr
Even well-composed photos sometimes need a bit of cropping. You may want to eliminate some unnecessary background or any visual clutter. Sometimes, you’ll need to resize the image for a specific format. To do this, open Pixlr and follow these steps.
- Log Into Pixlr And Open The Photo Editor.
- Select “open Image” And Locate The File On Your Computer.
- Choose “crop” In The Left Sidebar.
- Type In The Dimensions You Want. You Can Keep The Same Proportions And Crop The Image To A Different Size, Set New Proportions With Cropping, Or Resize The Image Without Cropping.
- Click “save.” Verify That The Image Is The Size And Proportions You Need And That You cut no valuable information out.
- Select “file Type” And Choose The Jpg Format With A Quality Of 60 - 80%.
- Click “download.”
- Upload Your Final Image Wherever You Need It.
Cropping Tips For Different Types Of Crops
Follow these guidelines for each type of crop to ensure a high-quality photo.
Portrait - Square
Crop and resize your image so that the horizontal and vertical dimensions are the same. We recommend 450 by 450 pixels.
Portrait - Horizontal
Crop and resize your image so that the portrait is wider than it is tall. We recommend 650 by 450 pixels.
Portrait - Vertical
Crop and resize your image so that the portrait is taller than it is wide. We recommend 450 by 650 pixels.
Landscape Photos
Crop and resize your landscape photo to make it a well-balanced banner image. We recommend 1500 pixels wide and 450 to 650 pixels tall.
Social Media Sizing
When you take photos to use on social media, it's crucial to work with the dimensions of each platform. You'll want to crop versions for optimal visuals for each of these platforms. Each social media platform, such as Facebook, Instagram, Pinterest, or LinkedIn, has different sizing guidelines which are ever-changing. Do a quick google search to ensure you have the most up-to-date size, and make versions of your cropped photo for each platform for optimal visuals.
Follow The Rule Of Thirds
-
Examine Your View
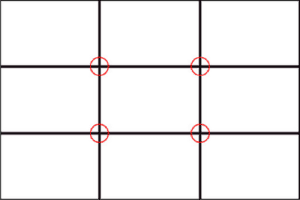
Imagine that the frame is divided into three sections, both horizontally and vertically, when composing your shot.
This box makes up nine rectangles.
-
Map Out Your Frame
Identify where those invisible rectangles overlap, e.g., where the bottom right third intersects with the middle rectangle.
-
Position Your Subject
Place your primary subject at an intersection of the thirds. If you’re capturing something in the right-hand part of the frame, aim to have them overlap the bottom right, middle right, bottom middle, and part of the middle rectangle.
-
Frame Up The Rest
Avoid centering any element in the image. For example, if there is a wall or treeline in the background, make sure it occupies the upper thirds, not the dead middle of the frame.
-
Build Up In Thirds
If you can’t constrain your subject to only one corner (e.g., in closer shots), frame them up in thirds. For example, you can position the subject to the left or right of the frame to occupy the intersections of the upper and lower rectangles. This practice makes a more natural shot than placing them dead-center.
-
Doubts? Fix In Post
It’s not always possible to perfectly frame your subject when shooting, but if you’ve captured enough white space, you can often crop your photo to place your subject within an intersection of thirds.
Need Some Guidance?
Are you a newbie photographer who could use some guidance? No worries! Dogpaw Studio's founder Chijo Takeda is a master photographer with tons of helpful tips and tricks to make professional photos a breeze.
Contact us at help@dogpawstudio.com, and we'll get you on the right track to being an expert in this trade.

Need Photo Taking Tips On The Go?
Start taking better photos now and download your helpful takeaway best practices guide to follow along with.
Dogpaw Studio are a Portland web design company for nonprofits, healthcare & mission-drive businesses. We also offer SEO and website care plans.
Get in touch with us today!